How to Upload a ChRIS Plugin
This is the final step to bringing your science to the world!
In this tutorial, we will be using the CUBE https://cube.chrisproject.org/api/v1/.
If you are using a different or private instance of ChRIS, simply change the URL.
Prerequisites
Only "staff" user accounts may upload ChRIS plugins.
Before you upload plugins, your CUBE must have compute resources for the plugin to be registered to. These can be created either using chrisomatic or the Django Dashboard, both described below.
Using the Django Dashboard
From the Django Dashboard you can upload a plugin from one ChRIS instance to another. You can find publicly available plugins at https://app.chrisproject.org/catalog
Log in at https://cube.chrisproject.org/chris-admin/. From here you can do administrative tasks such as connecting compute resources or adding plugins. To add a plugin, click on the "+ Add" button to the right of "Plugins" at the bottom of the page.
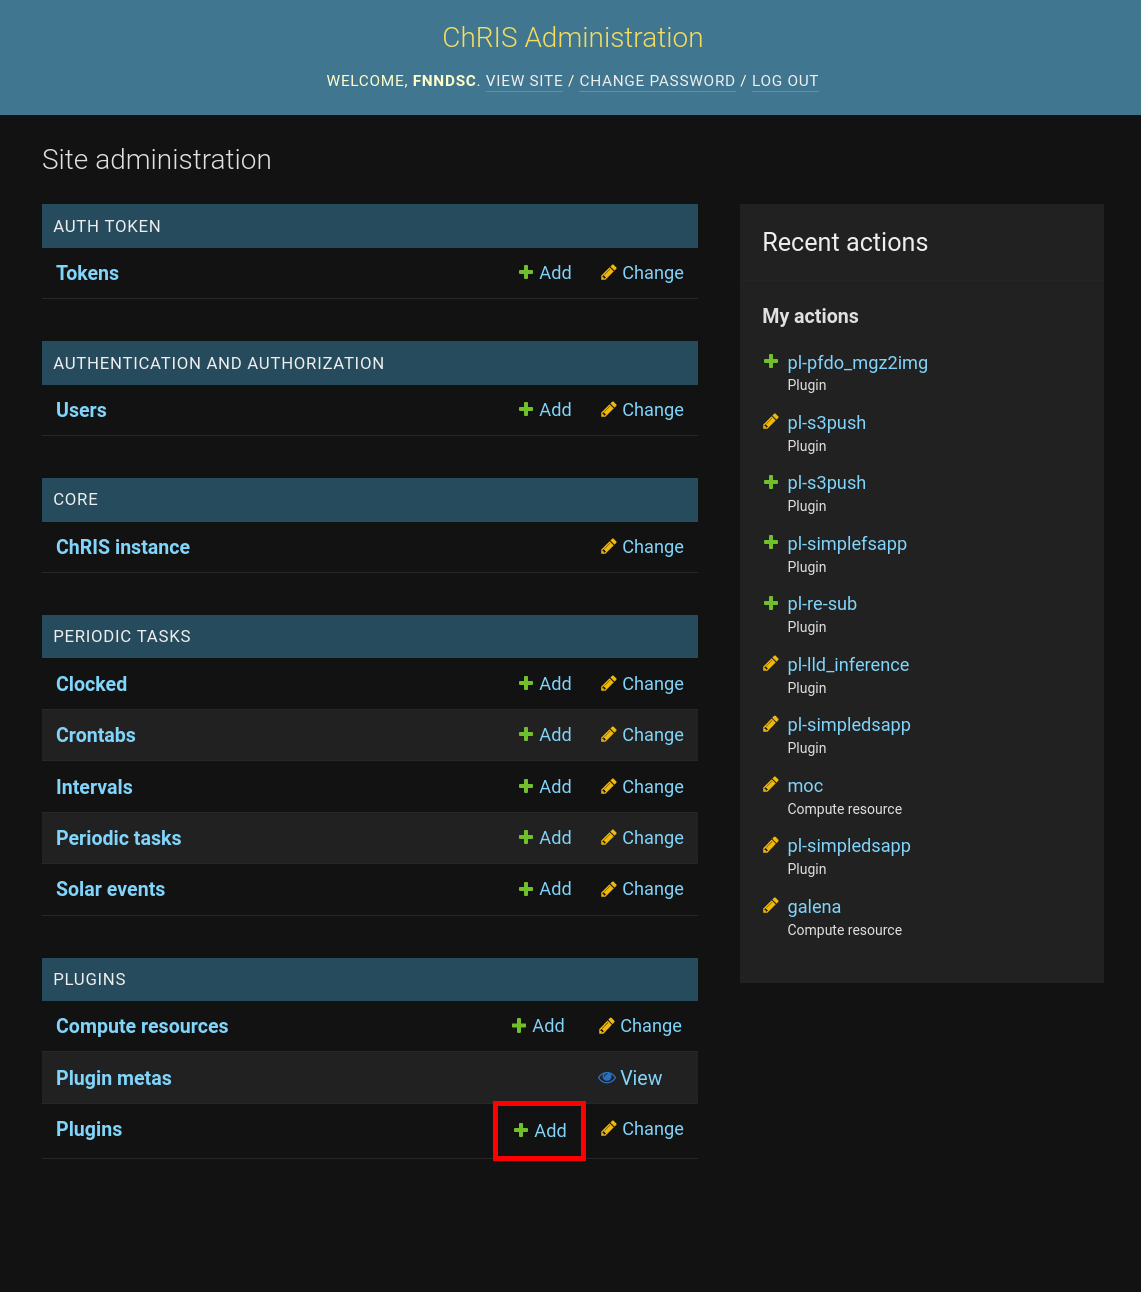
Fill out the "Add plugin" form. You need to select one or more compute resources. Ignore the "Identify plugin by name and version" section and type the URL of the plugin from the other ChRIS instance in the "Url" box.
A plugin URL usually ends with api/v1/plugins/N/, e.g.
https://cube.chrisproject.org/api/v1/plugins/19/.

Using the API
To upload a plugin using the ChRIS admin API, you'll either need:
- The plugin URL from another ChRIS instance
- A JSON description file
The schema of a plugin JSON description file is described by the
plugin spec.
The most common way to obtain a JSON description of a plugin is by running the
chris_plugin_info command, which is provided by the chris_plugin
Python package. Note that the chris_plugin_info command only works for ChRIS plugins
written in Python using the @chris_plugin.chris_plugin decorator.
Upload a JSON Description File
Suppose you have a Python-based ChRIS plugin container image fnndsc/pl-example:1.2.3.
Its JSON description file can be created and written to the file description.json by running
docker run --rm -it fnndsc/pl-example:1.2.3 chris_plugin_info -d fnndsc/pl-example:1.2.3 > description.json
To upload the file description.json and register it to the compute resources cluster1 and cluster2:
curl -u "$username:$password" https://cube.chrisproject.org/chris-admin/api/v1/ \
    -H 'Accept: application/json' \
    -F fname=@description.json \
    -F compute_names=cluster1,cluster2
Upload Plugin by URL Using API
curl -u "$username:$password" https://cube.chrisproject.org/chris-admin/api/v1/ \
    -H 'Accept: application/json' \
    -H 'Content-Type: application/json' \
    --data '{"plugin_store_url": "https://cube.example.org/api/v1/plugins/19/", "compute_names": "cluster1,cluster2"}'
Bulk Upload
Use chrisomatic to upload a list of plugins to ChRIS in bulk.
Automatic Plugin Upload
ChRIS plugin GitHub repositories can be configured to be automatically uploaded using GitHub Actions.
Non-canonical methods
While not officially supported, a python helper script, plugin2cube, is available that can effect registration by directly speaking to the CUBE API.
In some cases this can be a quicker/simpler way to register a plugin. It does however require the CUBE admin username and password and knowledge of the compute environments on a CUBE, and assumes that the host executing the script has docker installed.
For example:
plugin2cube --CUBEurl http://rc-live.tch.harvard.edu:32222/api/v1/ \
            --CUBEuser XXXXXX --CUBEpasswd  XXXXXX                 \
            --computenames galena-avx --dock_image ghcr.io/fnndsc/pl-dicom_repack:1.1.4